
How Can You Make Reach-In Closets More Functional Without Overspending?
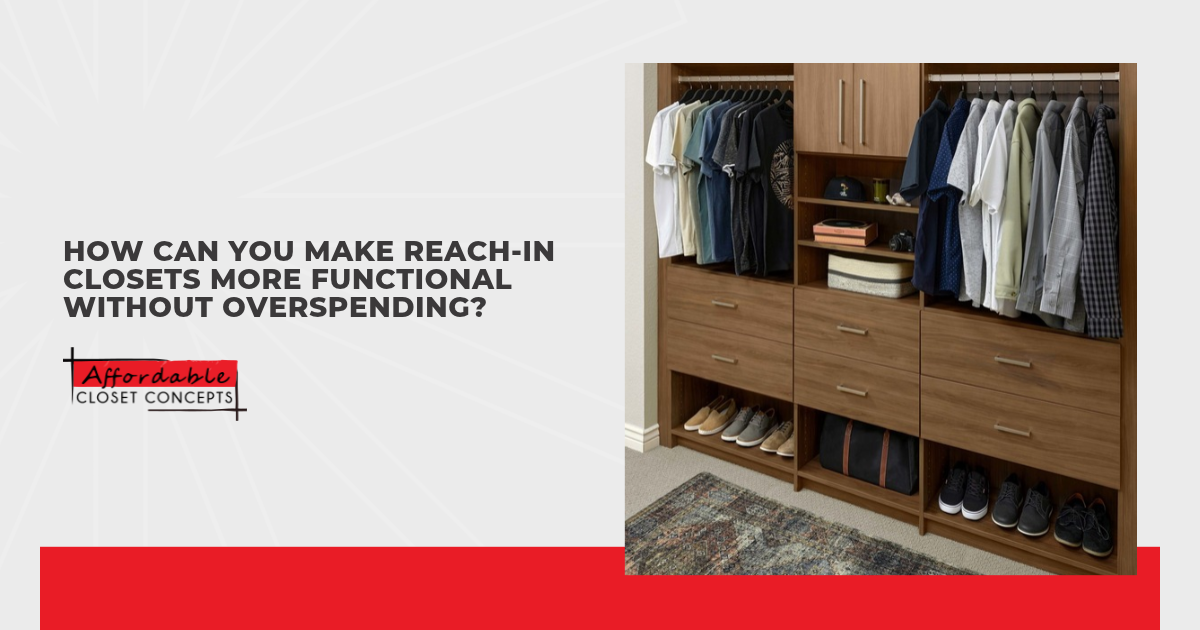
If you've ever opened your closet door and thought "there has to be a better way," you're not alone. Reach-in closets are often written off as too small to do much with, but that's rarely the real problem. What I see again and again is that the layout is working against the space, not the size itself. One rod and a single shelf simply can't keep up with how most people actually use their closet.
The good news is that making a reach-in closet more functional doesn't have to cost a lot. Small, targeted upgrades like adding a second hanging rod, using vertical wall space, and swapping loose piles for bins can completely change how the closet works for you. These kinds of changes are budget-friendly, practical, and don't require tearing anything out or starting from scratch. With the right approach, even the most cramped closet can hold more and stay organized longer.
Much of the space you're missing is already inside your closet, hiding above the shelf and below your shirts. Let me show you eight simple ways to uncover it in reach-in closets without stretching your budget:
- Start fresh by decluttering what you don't need
- Make the most of vertical space from floor to ceiling
- Add a second hanging rod to double your storage
- Use shelf dividers to keep stacks neat and tidy
- Put hooks and over-the-door organizers to work
- Choose bins and baskets for smarter storage
- Invest in a modular system that grows with you
Each tip below is one I'd happily use in my own home, and together they'll show you how reach-in closets can work twice as hard for a fraction of what a remodel costs.
Start Fresh By Decluttering What You Don't Need
Clothes you haven't worn in a year, shoes that pinch, and duplicates of basics quietly eat up space meant for things you reach for daily. Once they're gone, you'll see how much room reach-in closets really offer when they hold only what you use.
Try sorting each item into one of four piles as you go:
- Keep: Pieces you've worn in the last few months and still love go back in. Give them priority spots at eye level so your daily favorites stay easy to see and grab.
- Donate or Sell: Items in good shape that no longer fit your style or body deserve a second life elsewhere. Local thrift stores and resale apps can turn those pieces into extra cash for organizers.
- Store Elsewhere: Seasonal coats, formalwear, and keepsakes don't need front-row space in a reach-in closet. Move them to labeled bins under the bed or in a hall closet until you actually need them.
- Toss: Stained, torn, or stretched-out pieces aren't worth the space they take up. Recycle textiles where you can, and let go of anything you've been meaning to repair for over a year.
One of the biggest budget mistakes I see is buying organizers before the purge, then paying for storage that holds clothes nobody wears. Measure your remaining items after the sort, since those numbers tell you exactly how many shelves, rods, or bins you'll need. Keep a donation bag on the closet floor afterward, and you'll catch new clutter before it piles up again.
Make The Most Of Vertical Space From Floor To Ceiling
Most reach-in closets come with one rod and one shelf, which leaves a surprising amount of wall height unused. I usually start a closet plan by looking up, since the gap between the top shelf and the ceiling often hides a foot or more of open space. Once you treat the full height as storage, you'll gain room without widening the closet or spending much.
Break the wall into zones and give each one a clear job:
- Above the Top Shelf: Add a second shelf near the ceiling for items you use only a few times a year. Luggage, spare bedding, and holiday outfits fit well there, freeing lower shelves for daily essentials.
- Eye Level to Waist: Reserve this stretch for the clothes and accessories you reach for most days. Keep folded tees, jeans, and everyday basics here so getting dressed never calls for a step stool or awkward crouch.
- Floor Level: Slide a low shoe rack or two-tier shelf under your hanging clothes to stop footwear from piling up. Shirts and skirts leave ample room below, turning the floor into real storage.
- Side Walls: Narrow side walls inside the closet often sit bare, yet they're perfect for slim shelves or a vertical belt rack. Mount them into studs or with proper anchors so they hold weight safely.
Before you buy anything, measure from floor to ceiling and note where the current rod and shelf sit. Wire shelving and adjustable shelf kits from a hardware store cost little and shift easily as your wardrobe changes. Stack your least-used items highest and keep heavy pieces low, and your closet will feel roomier and safer to use.
Add A Second Hanging Rod To Double Your Storage
Shirts, blouses, and folded pants rarely need the full drop below a standard rod, so the bottom half of that space usually sits empty. Hang a second rod below the first, and you'll get two tiers in the same width, which nearly doubles your hanging capacity. It's one of the cheapest ways to make reach-in closets hold more without a remodel or a contractor's bill.
Pick the setup that matches your closet and your budget:
- Hang-Down Rod: Hooks over your existing rod and holds a second bar about 3 feet lower, with no drilling required. It's ideal if you rent, and most models cost less than takeout for two.
- Wall-Mounted Rod with Brackets: Brackets anchored into studs give you a sturdy lower rod that won't sway under weight. I steer clients toward this setup when jeans and work slacks fill most of the wardrobe.
- Adjustable Double-Hang Kit: Freestanding kits come with two rods and a frame you can raise or lower to fit tunics, kids' clothes, or cropped jackets. They cost more upfront but pack away easily if you move.
Plan for roughly 40 inches of clearance under each rod so shirts hang freely without brushing the tier below. Set the top rod near 80 inches and the lower one near 40, then save one end of the closet for a single rod if you own dresses or long coats. Group shirts on the upper rod and pants below, and you'll find outfits in seconds instead of sliding hangers back and forth.
Use Shelf Dividers To Keep Stacks Neat And Tidy
Sweaters, towels, and jeans stacked on an open shelf tend to lean, slide, and topple the moment you pull one piece from the middle. I've found shelf dividers are among the smallest purchases with the biggest payoff in reach-in closets, since they turn one long shelf into neat, upright sections. Each stack stays in its own lane, so you can grab a folded top without rebuilding the whole pile afterward.
Choose a style based on your shelf type and what you plan to stack:
- Clip-On Acrylic Dividers: Clear dividers slide onto wood or laminate shelves and need no tools or screws. They keep the look light and open, and you'll usually find a set of four at a cheaper price.
- Wire Dividers for Wire Shelving: Builder-grade reach-in closets often come with wire shelves, and these dividers clip straight onto the bars. Pick ones with a coated finish so they won't snag delicate knits or leave rust marks.
- Bookends or Tension Rods as a DIY Fix: Metal bookends or short tension rods wedged upright between two shelves can do the same job for next to nothing. Check your junk drawer or a dollar store before buying anything new.
Space dividers about 10 to 12 inches apart for folded tops, and widen the gap for bulky knits or jeans. Keep each stack no taller than your forearm so pulling an item out won't knock the rest over. Sort sections by category, like workout gear in one and denim in another, and you'll know at a glance when something's out of place.
Put Hooks And Over-The-Door Organizers To Work
Closet doors and bare corner walls rarely get used, yet they can hold a surprising amount of everyday clutter. Hooks and over-the-door organizers turn those dead zones into storage for bags, belts, scarves, and shoes, often for less than $30. Since they hang instead of sitting on a shelf, they free up prime space in reach-in closets without any construction.
Match each organizer to the items that tend to pile up in your space:
- Over-The-Door Shoe Organizer: Clear-pocket versions hold up to 24 pairs of flats or sneakers and let you spot each pair instantly. Pockets also work for rolled scarves, socks, or cleaning supplies if shoes already live elsewhere.
- Adhesive or Screw-In Wall Hooks: Mount a row along the inside side wall for purses, robes, or tomorrow's outfit. Choose screw-in hooks for heavy bags and leather totes, since adhesive versions can peel off in Tampa's humidity.
- Over-The-Door Hook Rack: Slim racks slip over the top of the door and hold coats, hats, or bath towels with no drilling. Look for felt-lined hooks so the rack won't scratch paint or bang the frame.
- Belt and Tie Hangers: Swivel or multi-hook hangers keep belts, ties, and necklaces untangled while taking up just a few inches of rod. You'll see every option at a glance instead of digging through a dresser drawer.
Before buying an over-the-door piece, test it on your door to make sure it clears the frame and doesn't block the latch. I always have clients check their door type first, since bifold and sliding doors usually need wall-mounted hooks instead. Keep heavier items near the hinge side, and your door will swing smoothly without sagging over time.
Choose Bins And Baskets For Smarter Storage
Loose items like socks, scarves, and gym gear slip off shelves and end up in a tangled heap on the floor. Bins and baskets corral those small pieces into defined groups, so your shelves stay orderly even when you're rushing out the door. Since they sit right on existing shelving, they add structure to reach-in closets without any tools or installation costs.
Mix and match these container types to suit each shelf:
- Clear Plastic Bins: See-through sides let you spot socks, belts, or swimsuits without pulling anything down. Stackable versions with lids work well on high shelves and keep dust off items you use only occasionally.
- Woven or Fabric Baskets: Soft-sided baskets add warmth to open shelves and hide less attractive items like spare chargers or workout bands. Choose lined versions, since bare natural fibers can trap moisture and snag delicate fabrics.
- Labeled Bins with Front Handles: Front handles let you slide high-shelf bins down safely, while clear labels show family members exactly where items belong. Pick chalkboard or slip-in tags so you can relabel bins whenever seasons change.
Measure shelf depth and height before you shop, then subtract an inch on each side so bins slide in and out easily. Stick with one color or material across the closet, since matching containers make a budget setup look polished and intentional. I'd rather see a few well-sized bins than a dozen mismatched ones, because fewer containers mean fewer places for clutter to hide.
Invest In A Modular System That Grows With You
Modular closet systems use standard parts like wall tracks, shelves, rods, drawers, and baskets that hang from one shared frame. You can buy a basic starter layout now and add pieces as your budget allows, rather than paying for a full build all at once. Since parts move and swap without new holes or extra labor, reach-in closets stay useful through job changes, new hobbies, and growing kids.
Keep these buying habits in mind so your system pays off for years:
- Start with a Track-and-Standard Base: Wall-mounted top tracks with hanging standards let you move shelves and rods anywhere along the wall. Install this frame first, since every drawer, basket, and rod you buy later hangs from it.
- Stick with One Brand or Product Line: Components from different systems rarely share the same slot spacing or bracket style, so mixing them wastes money. Stay within one product line so replacement parts and future add-ons fit right away.
- Add Pieces In Order of Daily Need: Buy the parts that solve your biggest frustration first, whether that's a drawer for undergarments or a pull-out hamper. Wait on extras like valet rods until the essentials prove their worth.
- Watch for Sales on Add-On Components: Retailers often discount drawers, shelves, and accessories during seasonal sales and holiday weekends. Keep a running list of the exact sizes you need, so you can buy quickly when prices drop.
I tell clients to judge a modular system by its weakest part, so check the weight ratings on brackets and drawer slides before you commit. Solid wood or thick laminate shelves hold up far better than thin particleboard, which can bow under stacked jeans within a year. Snap a photo of your layout and keep receipts and part numbers in one place, so reordering a matching shelf takes minutes.
Conclusion
A well-functioning closet isn't about size or budget. It's about making smart choices that match how you actually live. Even the smallest adjustments can shift a frustrating space into one that feels calm and easy to use every day. You don't need everything perfect from the start. Build at your own pace, trust the process, and you'll end up with a closet that genuinely works for you.